Gridview is one of the most powerful web controls which is used in most of the ASP.Net web applications to display information to the user in tabular form. In this article, we are going to discuss on
- How to apply styles to gridview
- How to apply style to a particular row based on the row values
Before discussing on how to apply styles in gridview, let me the explain the role of HTML,CSS in ASP.Net webform application. Understanding these basics would help you to handle the things better.
Role of HTML,CSS,Javascript in ASP.Net web application(or web application using any framework):
Web browsers (Internet Explorer,Firefox, Chrome etc..) are the applications which can understand only HTML, CSS and Javascript. Ofcourse, there are few exceptions. We can install some plugins in the browser so that it can interpret few other things as well. But most of the browsers (as it is installed) would understand only HTML, CSS and Javascript. Irrespective of the web framework you are using to build the web application(ASP.Net, Java Struts2,Ruby on rails, Django etc..) your web application should be converted to HTML,CSS,Javascript for the browser to understand. This is the reason you don’t need different browsers for the web applications built on different technologies as all are being converted to HTML,CSS and Javascript so that all browsers can understand.
HTML would provide you the layout of the web page – which content should be at what place
CSS(Cascading style sheet) would help you in applying styles to elements of the page. E.g, If you want all paragraph text to be italic and in blue color, CSS would help you to achieve it easily without much modification to the code. I am including inline styles as well in this category for clarity.
Javascript is for processing the elements at client side without going back to the server. Using ajax, though you can go to the server to get server data. Javascript is mainly used for validation, handling the user input, changing the style of some element based on data or user input etc…
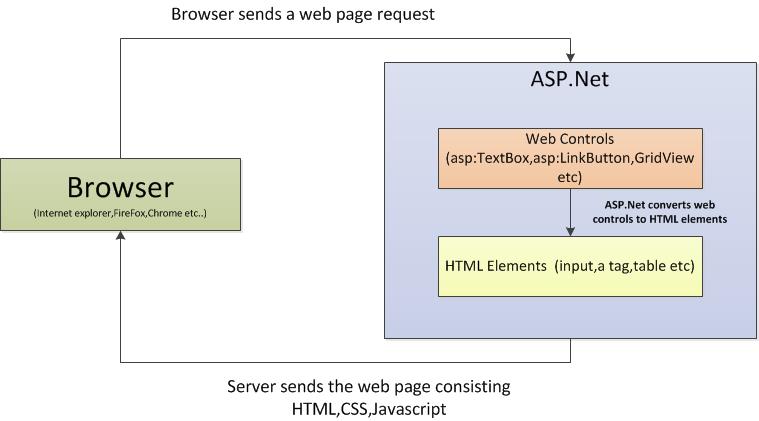
So the web controls that you use in your webform would be converted to any of the HTML elements as shown in the below picture. For example, asp:Textbox would be converted to input HTML element, asp:Linkbutton would be converted to anchor link HTML(<a>) and so on… This conversion is required for all web controls as browsers can understand only HTML,CSS and Javascript.
Out topic of interest – Gridview web control in ASP.Net is converted to table element of HTML. So whatever the style you want to apply to the gridview would be applied to table element of the generated HTML. We have had enough theory. Let’s apply some style to Gridview so that it can look great J
Applying style in Gridview:
You can apply your custom style for the Gridview as per your application style. In this article, we are going to use Bootstrap CSS. Bootstrap(http://getbootstrap.com/) is one of the popular front end framework which is being used in many of the web applications today. You can either download the related CSS,javascript to use in your application or you can use them directly by referring them at their CDN. In this example, I have referred the CSS and JS directly as shown below.
<head runat="server">

<title></title>

<!-- Latest compiled and minified CSS -->

<link rel="stylesheet"href="//netdna.bootstrapcdn.com/bootstrap/3.1.1/css/bootstrap.min.css"/>

<!-- Optional theme -->

<link rel="stylesheet"href="//netdna.bootstrapcdn.com/bootstrap/3.1.1/css/bootstrap-theme.min.css"/>

<!-- Latest compiled and minified JavaScript -->

<script src="//netdna.bootstrapcdn.com/bootstrap/3.1.1/js/bootstrap.min.js"></script>

</head>
There is an attribute by name CssClass in Gridview. If you set this property to a style, it would impact the whole table. I am going to use bordered table style for my gridview as depicted in the link – http://getbootstrap.com/css/#tables-bordered
<asp:GridViewID="gv" runat="server" CssClass="table table-hover" AutoGenerateColumns="false"   DataKeyNames="ProductNumber">

<Columns>

<asp:BoundField DataField="ProductNumber" HeaderText="Product Number"  />

<asp:BoundField DataField="Name" HeaderText="Name" SortExpression="Name"  />

<asp:BoundField DataField="ReorderPoint" HeaderText="ReorderPoint" SortExpression="ReorderPoint"  />

<asp:BoundField DataField="ListPrice"HeaderText="ListPrice" SortExpression="ListPrice"  />

</Columns>

</asp:GridView>
You can combine multiple css classes by mentioning them separated by space. In the above gridview, I have used css classes table , table-hover
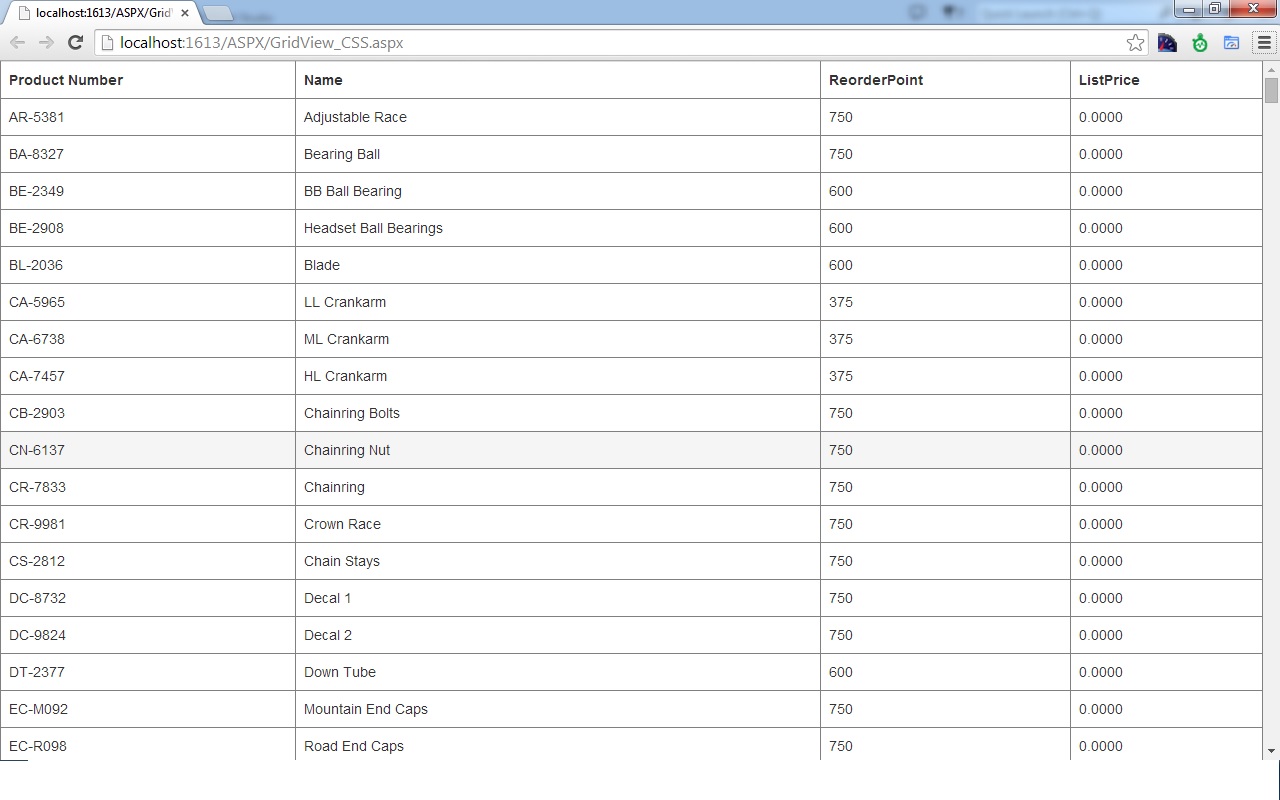
The resulting gridview is shown above. I am going to add table-bordered class to CssClassAttribute so that the table is bordered nicely. The complete CssClass attribute value is
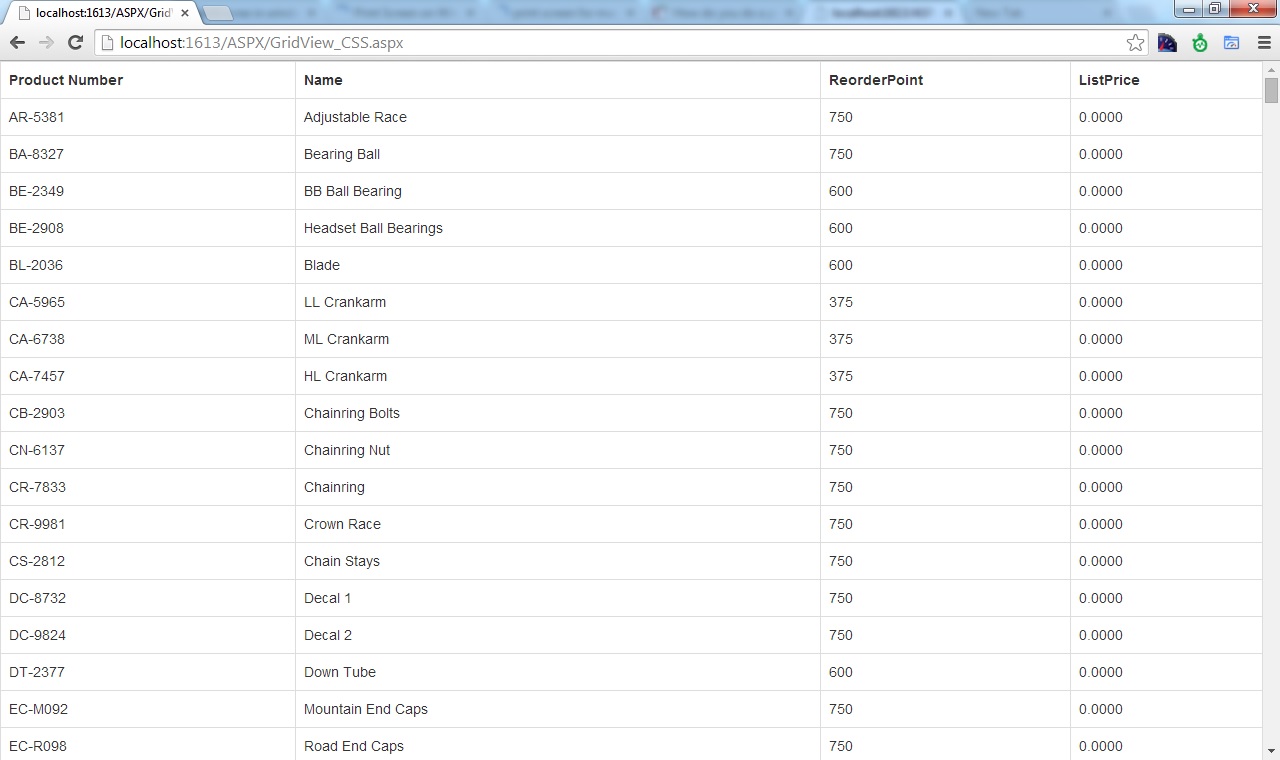
CssClass=”table table-hover table-bordered”
And the resulting gridview is shown below
Applying style to a particular row based on the data:
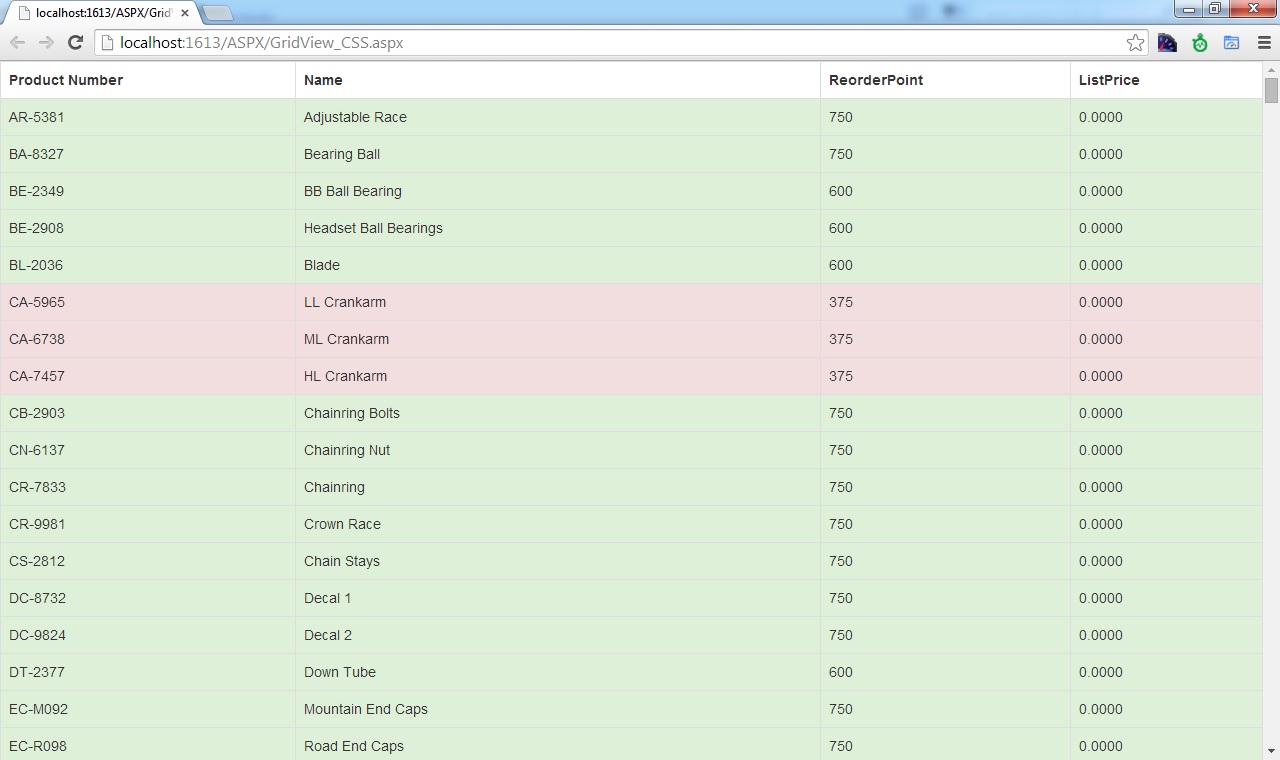
Let’s consider a scenario where we need to apply different style to a particular row based on row values so that it would be highlighted to the user. To achieve the same, define the event for OnRowDataBound and in this event apply the style for a particular row based on a value. Using the same Product table of AdventureWorks database, I would like to apply style success if the ReOrderPoint is greater than 500. Else, I want to apply the danger style defined in bootstrap.
<asp:GridViewID="gv" runat="server" CssClass="table table-hover table-bordered" AutoGenerateColumns="false" OnRowDataBound="gv_RowDataBound"   DataKeyNames="ProductNumber">

<Columns>

<!—Columns omitted for clarity -->

</Columns>

</asp:GridView>
protected void gv_RowDataBound(object sender, GridViewRowEventArgs e)

{

if (e.Row.RowType == DataControlRowType.DataRow)

{

int reorderPoint = Convert.ToInt32(e.Row.Cells[2].Text);

e.Row.CssClass = reorderPoint > 500 ? "success" : "danger";

}

}
In the above gridview RowDataBound event, I am applying success style to the row if the Reorderpoint column(3rd Column – as its zero based index I am taking value as e.Row.Cells[2].Text) value is greater than 500. Else I am applying danger style.
Now, when you run the application, you would get gridview like below.
Please let me know your thoughts in the comments section.
Thanks for reading the article. Please subscribe to my mailing list below.


Leave a Reply